Tuesday 10 January 2012

How to add a Gadget

Gadgets are places where you can put things, like links to sites you like, or they can be where your followers click to subscribe to your blog. Here's how to add them, from Blogger's Help Center: 

Customizing your layout

Your template is a fun way to customize your blog. When creating a new blog, you're first asked to choose a default template, this is the basic design of your blog. You can choose from many templates for your blog; simply pick the one that best fits your needs. In addition, you cancustomize your blog's design using our intuitive drag-and-drop interface. You can also add powerful gadgets such as slideshows, or user polls. Changing the fonts and colors on your blog is easy, too. If you want more precise control over your blog's layout, you can also use the Edit HTML feature. To edit your blog's layout, follow these steps:
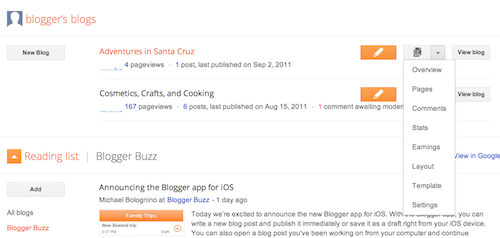
  1. Click the Layout link from the drop-down menu on your dashboard below the blog you would like to customize.

  2. Dashboard
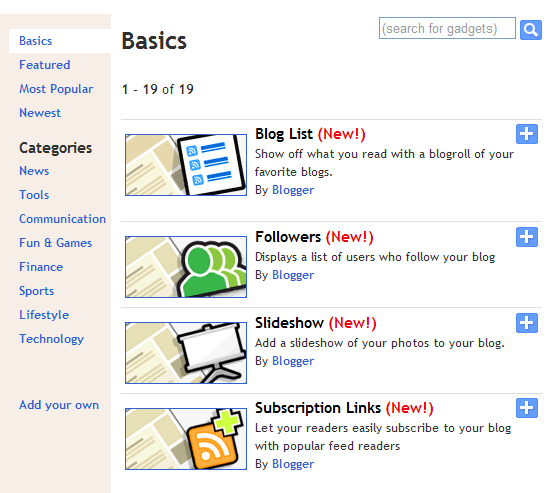
  3. From there, click Edit to edit existing gadgets, or Add a Gadget to add new ones.
  4. To add a new gadget after you've clicked Add a Gadget, simply click the plus sign next to your desired gadget. You can choose from gadgets by category, or search for a specific gadget in the top right of the pop-up window.gadget list
  5. Once you've added the necessary information to your selected gadget, click the orange Save arrangement button. Your layout changes will appear instantly.

How to add a link


Here's how to add a link to your post!


  1. Go open another tab in Google Chrome. It's the tiny (+) button next to the tab you have open. 
  2. Find the page you'd like to link to. 
  3. Copy the web address by highlighting all of the text, right clicking, and pressing "Copy".
  4. Go back to Blogger's tab.
  5. Highlight the word you'd like to make a link. (If you haven't started a New Post, do that first.)
  6. Press the "Link" button in the editing toolbar. 


  1. Paste in the address of the website you'd like to link to.
  2. Press OK. 

How to add a picture


Here's where Mr. R. will be posting helpful links to show you how to do things on Blogger! The first post will cover how to post an image into your blog. From Blogger's Help Center: 

Add an image

You can add an image from your computer or the Web to your blog. Click the image icon in the Post Editor toolbar. A window appears prompting you to browse for an image file on your computer, or enter the URL of an image on the Web.
Once you've selected your image, you can then choose a layout to determine how your image will appear in your post:
  • The 'Left', 'Center', and 'Right' options allow you to customize the way your blog text will flow around your image.
  • The 'Image size' options will determine how large the image will appear within your post.
Click UPLOAD IMAGES to add your image, and then click DONE when the notification window appears telling you that 'Your image has been added.' Blogger will then return you to the post editor, where you'll see your image ready to be published to your blog.
You can also publish images to your blog using your mobile device, Google's free photo software Picasa, or a third-party service like flickr.